Allocating Cost for an Expense Report Line Item
Cost allocation helps track costs more efficiently by accurately assigning costs to specific areas within an organization such as such as client projects or store locations.
You can allocate the cost of a single line item (or itemized transaction), or allocate the cost of several line items or an entire expense report, in order to attribute expenses to specific cost segments with specific cost allocation codes (such as “1001 Project ABC” or “101 San Francisco Store”). You can also split the allocation for a line item by the amount (in currency) or by percent to more than one cost segment.
Allocating Cost for Each Line Item
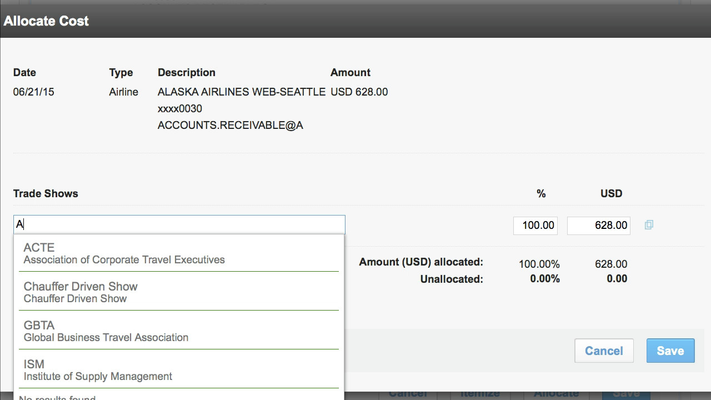
If your administrator has enabled cost allocation, you can click the Allocate button that appears between the Itemize and Save buttons to change the cost allocation for the line item. The Allocate Cost dialog appears, with the cost segments appearing as subheadings (such as "Trade Shows" in the figure below). You can start typing the cost allocation code for a cost segment and choose one of the type-ahead suggestions that appear, including the most recently used cost allocation codes:
If your administrator set up two cost segments, both segments appear, and you can select a cost allocation code in either segment in any order. If the cost segment is a subsegment of another cost segment (for example, a Project segment that is a subsegment of a Corporate Division), you can select a cost allocation code for the parent cost segment (Corporate Division), and then the subsegment (Project) dropdown menu shows only the cost allocation codes that are appropriate for the parent cost segment. If you select a cost allocation code for the subsegment first, the parent segment selection is automatically populated with the appropriate parent.
Save your changes by clicking the Save button. You can save your cost allocations even if they are not complete, and return to complete them later.
Splitting the Cost Allocation for a Line Item
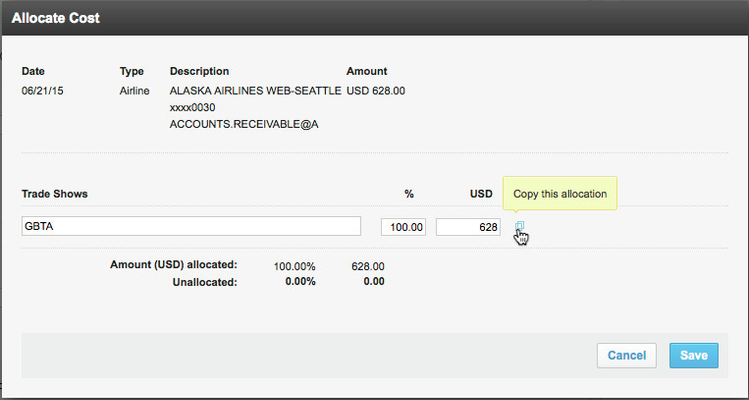
You can split the allocation for a line item by the amount (in currency) or by percent to more than one cost segment. For example, if you hosted a company meal for multiple departments, you can split the cost of that meal to allocate costs to each department. If you visited multiple customers to support multiple projects, you can split the trip amount to allocate costs for each customer and project.
To add another cost allocation, click the "Copy this allocation" icon next to the amount on the right side:
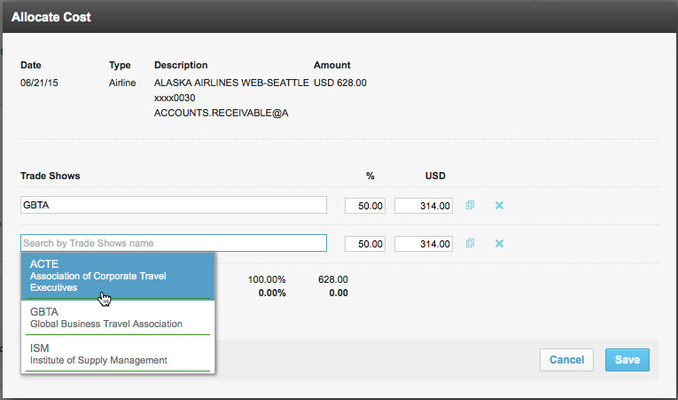
Another cost allocation row appears, and you can then edit the second allocation row.
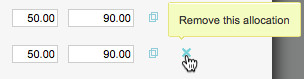
You can also click the "Remove this allocation" icon to remove a row:
To split the cost allocation, edit the percentage or amount fields. As you edit one field, the other is calculated for you. Unallocated or over-allocated amounts are calculated automatically.
Save your changes by clicking the Save button. You can save your cost allocations even if they are not complete, and return to complete them later.
Allocating Cost for Itemized Line Items
You can also allocate itemized expenses. After saving an itemized line item (see Itemizing an Expense Report Line Item for details), click the itemized line item in the expense report. You can then click the Allocate button that appears between the Itemize and Save buttons to change the cost allocation for the line item. The Allocate Cost dialog appears, and you can select a cost allocation code for each cost segment, and split the cost allocation if needed as described in the previous section.
Allocating Cost for Multiple Items or an Entire Report
You can allocate costs for multiple line items at once, or for an entire report at once. For example, if you have a 30-line expense report, you can quickly select all of the line items by clicking the checkbox at the top of the list of line items, or select several line items by clicking each item's checkbox, and then choose Allocate Cost from the More Actions menu. The Allocate Cost dialog appears so that you can allocate the costs for all selected line items.
Tip: A list of cost allocation codes for a cost segment may be very long. You can quickly find a specific cost allocation code by starting to type the label or code, and the system suggests matches. You can then select a suggested match. You can also navigate up or down the list of cost allocation codes using your keyboard’s arrow keys.
Creating a New Cost Allocation
As an expense report submitter, you can create a new cost allocation in an expense report if an appropriate one doesn't exist. While creating it, you can search for parent allocation segments and create the allocation segment hierarchy for the new cost allocation. You can create the new allocation when creating an expense report, entering a cost allocation for a line item, entering a cost allocation for all selected line items at once, or adjusting a line item.
Note: The Admin Access administrator must first set the "Entries Added By" option for the cost segment to allow employees to enter allocation codes for that segment. See Setting Up Cost Allocation for details.
As you start typing the cost allocation for a cost segment (such as "Spend : Expense" below), you can choose one of the suggestions in the dropdown list that appears. If the cost segment is enabled for you to create new allocations, the Create new... selection appears at the bottom of the dropdown list (as in Create new Expense below).
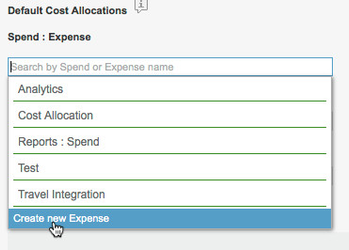
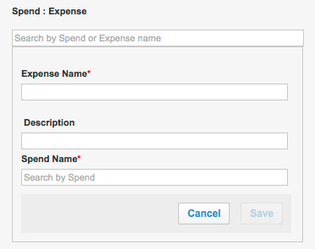
Choose Create new... to create a new cost allocation. The view expands to show fields for entering a name for the cost allocation ("Expense Name" below):
To choose a parent cost segment ("Spend Name" above), start typing the segment name, and suggestions for existing segments appear in the dropdown list:
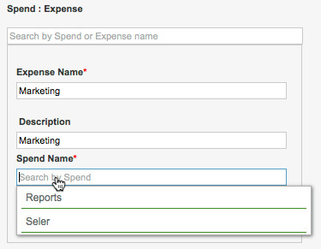
You can either choose a suggested segment from the list for "Spend Name" (such as Reports), or enter a new segment name, such as Customer:
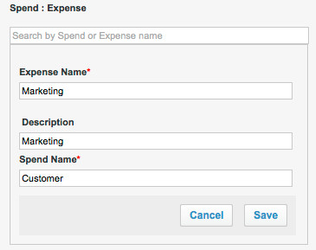
Click Save to save the new cost allocation and assign it to the report or line item.